
Introduction
In many workshops, information relating to a commission is scattered across various sources: WhatsApp conversations, notes in notebooks, photos in the mobile phone’s gallery and loose notes on the workbench. This disorganisation leads to practical errors: proofs that repeat adjustments already made, old measurements applied without being checked, delays caused by not being able to find a photo, or confusion over who authorised a change. The result is wasted time, dissatisfied customers and more rework.
The aim of this article is to provide a simple method that can be implemented from day one to record and track every order without losing any data. It is not about imposing complicated technology or lengthy processes, but rather about establishing clear routines — whether physical or digital — that ensure every garment has a unique and up-to-date record from the initial conversation right through to final delivery.
The approach is practical and stems from real-life situations in the workshop: customers bringing in photos, previous measurements that don’t add up, decisions made via WhatsApp between fittings, and garments delivered with distortions because a detail of the fabric was not noted down. The following section outlines how to organise the initial measurements, manage fittings and finalise the order with a file that can be used for future reference.
Tone and immediate use
These recommendations are designed for tailors, dressmakers and workshop managers who need solutions they can put into practice straight away. You’ll find checklists, examples of what to photograph and how to label it, and brief procedures for transferring informal decisions to the official record. By implementing these within a week, you’ll notice fewer internal enquiries, less back-and-forth with customers and clearer tracking of each job.
What to avoid in this system
- Don’t assume that old measurements are still valid without checking them: your body changes and sizes aren’t set in stone.
- Do not rely solely on WhatsApp or your memory for decisions: any changes must be noted on the order form.
- Don’t rely solely on a notebook with no copies and no organisation: organise your records so that anyone on the team can find the information within minutes.
The following sections set out the minimum requirements for the initial data collection, how to organise the tests, and a process for closing the assignment to ensure it is archived correctly. At the end, a practical option is suggested for centralising the information should you wish to digitise the entire workflow.

Test management and interim reporting
Fittings are at the heart of the process: this is where measurements are confirmed, the garment’s drape is decided, and changes are often made. Without a clear routine, decisions end up scattered across messages, notes and memory. Below are some simple steps and tools to ensure that every fitting is properly documented and to minimise errors.
Arranging trial appointments
- Confirm the appointment via the agreed channel (phone call, text message or WhatsApp) and record the following details on the job sheet: date, time and the person responsible for the test.
- When booking the appointment, clearly state what the customer should bring (footwear, specific underwear, accessories) and what is to be fitted (lining, length, collar). Write this list on the form so that the customer and the workshop can refer to it.
- Send a reminder 24–48 hours in advance and ask for confirmation; if there is a change, note the new date on the file and in the workshop calendar.
Clear record of changes in each test
- Use a brief template for each test: date, person who took the note, items tested (e.g. sleeve length, trouser rise), adjustments made and new numerical value, if applicable.
- Add visible markings to the photographs (small stickers or notes on the image) and use arrows or labels to indicate what has been altered: “+2 cm hem”, “front centre pinned 1 cm”.
- Always record who authorised each change: the customer in person, by phone or via message. If it was via message, paste the extract onto the file and add the time.
How to handle informal conversations (WhatsApp)
- Don’t leave decisions solely in the chat. After any agreement is reached on WhatsApp, transfer the information immediately to the job file: copy the date/time and the key text.
- Set a maximum time limit for this transcription (ideally: as soon as the test is finished or, at the very latest, before the end of the working day). Make this a regular routine so that unrecorded messages do not pile up.
- If a significant query arises in the chat, arrange a brief call and note the outcome on the file; interpreting text alone often leads to errors.
Version control for photographs and notes
- Name the photos using a clear format: [Reference]-[Client]-YYYYMMDD-TestX (e.g. BLAZER_JGonzalez_20260915-P1). This makes it easy to find the image by date and session.
- Save each photo in the project folder and do not overwrite previous files. Keep at least two versions: “before” and “after” for each major adjustment.
- If you’re working with paper, stick a printed copy of the photo onto the index card and write your notes around it; if you’re working digitally, attach the photo and add notes in the relevant field.
Minimising errors between tests
- Attach temporary labels to the garment (pins with notes, numbered strips of tape) indicating which side and which fit it requires. This prevents the person ironing or fitting the lining from making any unwanted alterations.
- At the end of each session, provide the client with a brief written summary (on paper or via message): a list of the adjustments made, the next steps and the proposed date for the next test.
- Gather the team at the end of the day to update any outstanding records: transfer decisions from WhatsApp, upload photos and review any amended measurements.
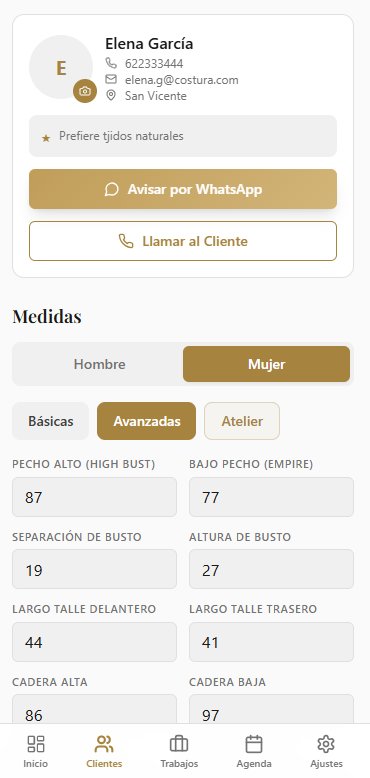
With these workflows, the information from each test is linked to the job file, making it visible and verifiable. If you’d prefer to centralise this workflow digitally from day one, tools such as SastrePro can help you store photos, notes and authorisations in one place.
Closure of the case and filing
The handover is the stage where all the work carried out is turned over to the customer and, if not done properly, can lead to complaints. Here is a specific procedure for checking, recording and filing each job so that the workshop can retrieve it quickly and learn from it for future jobs.
Final checks before handover
- Fitting check: go through the basic checklist (length, waist/hip, shoulders, presence of unwanted creases, drape of the lining). Mark each item on the form as «OK» or explain any deviation.
- Checking the final measurements: note down the final measurements as the garment stands; do not assume that they are the same as the measurements taken at the last fitting.
- Quality check: seams, tension, buttonholes, buttons and finishing touches. If any minor alterations are required, make a note of what remains to be done and the deadline for completing it.
- Photos of the finished garment: take front, side and close-up shots of fitted areas (waist, shoulders, neckline). Name the files using the order reference and date (e.g. REF123_2026-09-26_finished.jpg).
Delivery record
Delivery must be recorded immediately to avoid any confusion later on:
- The date and time of delivery are noted on the form.
- Person who collected the item: name and ID number, if applicable (useful for valuable items or expensive repairs).
- Conditions agreed upon at the time of handover: the condition of the garment, any outstanding alterations (if any) and the estimated timeframe for completing those alterations.
- Customer confirmation: where possible, obtain a handwritten signature or a photograph of the customer wearing the garment, along with a brief note of approval sent via the agreed method (WhatsApp/email). Keep this confirmation with the file.
Records management and information preservation
A well-organised filing system makes it easier to find things and reduces errors in future orders. Adapt this to the size of your workshop:
- Retention period: keep the complete file and photographs for at least one year after delivery. If the customer is a regular or the garment will form part of a record (wedding suits, uniforms), keep them for longer, subject to available space and local regulations.
- Physical organisation: one folder per year, with folders within each year numbered according to the commission reference; the file description must be the first sheet, followed by printed photographs or thumbnails where necessary.
- Digital organisation: main folder by year > subfolder by reference. Standard file names: REF_date_type (e.g. REF123_26 September 2026_data sheet.pdf, REF123_26 September 2026_completed.jpg).
- Backup: at least one digital copy stored outside the workshop (cloud service or external hard drive) to prevent data loss due to theft or equipment failure.
Practical solutions for small workshops
- Use a printable single-page template: fill it in on paper throughout the day and scan it at the end of the day to add it to the digital file.
- Standardised quick notes: A7-sized stickers or cards for noting urgent changes to the garment and sticking them onto the file until they are transferred to the main record.
- Daily/weekly routine: set aside 15–30 minutes at the end of the day to move relevant WhatsApp messages to the file and rename photos; a more thorough weekly review to organise folders and check deadlines.
If you’d prefer to cut down on this manual work from today onwards, there are tools available to centralise records, photos and communications in one place; for example, SastrePro It can help you record and track orders without the information being scattered across multiple platforms.